
The other evening, we re-heated some
grilled, frozen brats and cooked a can of pork and beans over the firepit.
grilled, frozen brats and cooked a can of pork and beans over the firepit.

Jason waiting for the food to get hot. Don't you love our deck chairs? I found those at a yardsale for cheap. And even though they are wooden, they are pretty comfortable!
In the last post, The Kitchen Tear Out, you could see where the hardwood flooring had been put in around the old cabinets, and we had "holes" in the floor where the cabinets were just sitting on the sub-floor.

We also discovered that our under the sink plumbing was not the most conducive to putting in a new sink cabinet base.

We hired a local flooring company to come in and patch all of the holes in the kitchen floor, as well as the holes in the living room where we took out the closet and beam.

When they came out to give us an estimate, they told us how they could put in a matching, wooden floor vent that is flush with the floor. We chose to have that done as it's the only floor vent in the house, and having the normal, metal vent that sits on top the floor is not very conducive for the kitchen table and chairs.
The flooring people did an excellent job, we thought, and the floor looks soooo pretty and shiny! I told Jason we can't wear shoes in the house anymore because I don't want to mess up the pretty floor!
The flooring people finished putting on the 2nd coat of polyurethane on Friday, and today the cabinet people came to install our new cabinets!!!

I have to say, I didn't realize we were getting a monster sized cabinet to go above out elephant sized fridge! But, I've been thinking all day long about what all we can put in there; we can finally fit cereal boxes, our trail mix tubs, our lunch boxes, etc. in the cupboard!!!
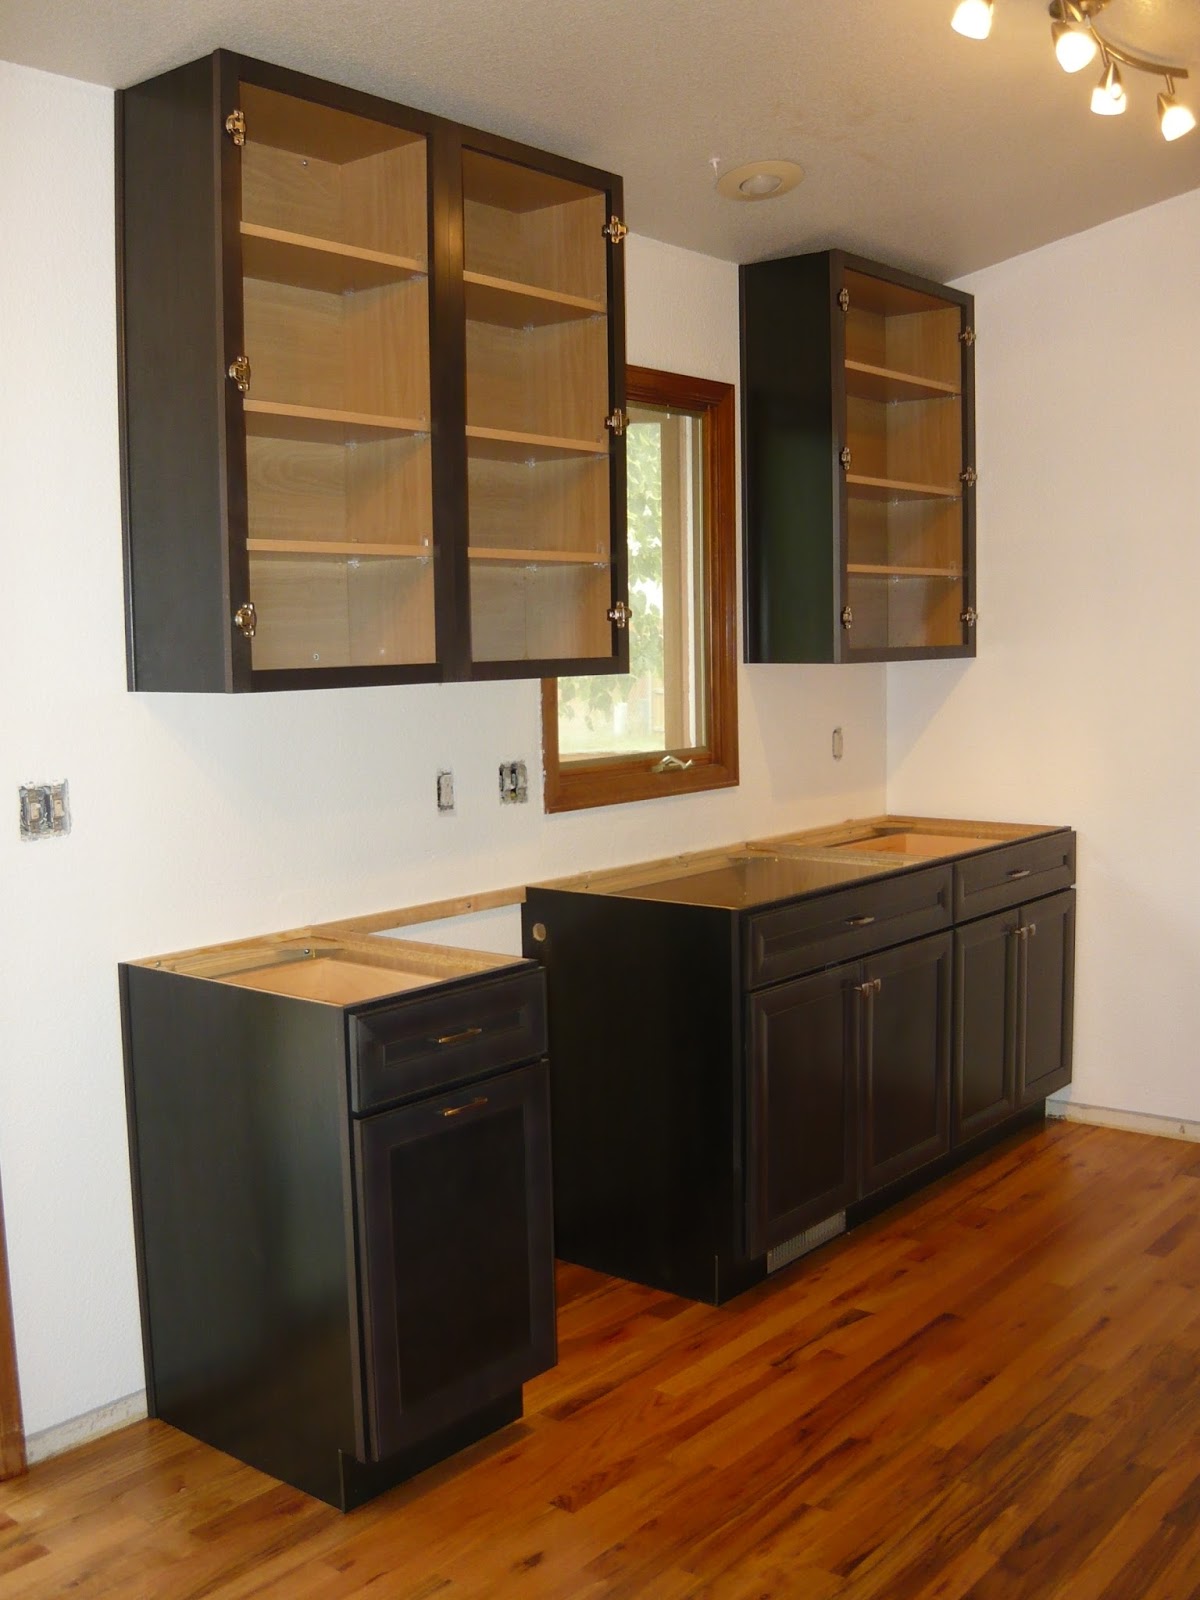
There is so much space in the upper cupboards now! Unfortunately, the glass doors were not ready, so they will be coming back next week to put those on the upper cupboards. And did you see that the kitchen walls are no longer blue, but instead white?! We have put 3 coats (1 primer, 2 paint) on those walls, and the blue is still not completely covered. It's mostly noticeable around the edges, so I decided to wait until the cabinets were up and then see what areas are still visible that need another coat.

They did run into one snag with this electrical outlet for the over-the-range microwave. Apparently, the original cupboards were mounter lower than standard. When we added the flooring, that raised the base cupboards up, which in turn meant the space between the counter and upper cupboards would be smaller, or we needed to mount the upper cupboards higher. When they measured to mount the cupboards higher (to standard height), they found that the electrical outlet was too low. Thankfully, they were skilled enough, and able to, move the electrical outlet higher so that it is in line with the new upper cupboard height. The poor man that was doing the electrical part did get shocked once, because no one knew that there were two breakers running electricity to that area!
*Disclaimer: they did test the outlet when turning off the breaker to make sure there was no juice, and there was not. But something else in there was getting juice from another source!

I personally am excited about this pull out drawer thingy; no more scrubbers on the counter! That was one of my specific requests in the new cabinets.

Pull-out shelves on the bottom cupboards!

And they are all the full depth of the cupboard!

Our lovely drawers, which are dove-tail, soft-close, and full, extended pull-out, are deeper.

For comparison: the old drawer with a regular sheet of paper inside, and pulled all the way out....

And the new drawer - same paper and the drawer pulled all the way out.

I am soooo glad we could get one big drawer here, instead of having two small drawers!

This cupboard and drawer base is significantly bigger than what we had here before....

The old drawer wasn't even 8" wide.

A trash-can drawer. This is the only other cupboard that I wasn't completely clear on what we were getting. I liked the idea of the trash being hidden, but I thought it was going to be an actual drawer. My plan was to set a trashcan on one end, and put a potato and onion bin on the other end. Now I'll just have to re-think my strategy. Jason, however, LOVES the trashcans. But what would we do with TWO trashcans?

The drawer and door handles.

Sorry - the flash didn't enhance the photo on this one. My goal with the handles was for them to be easily cleaned and not prone to collecting dirt in cracks and crevices.
Now, I have a public opinion question. I want to have a double curtain rod for the patio doors which are right beside the kitchen. Which of the following would you choose:

The original, single curtain rod (don't mind the spider webs and dust), which I could re-use and just get a smaller rod to put behind it for the sheer.

Or, I found this double-rod for a good price, and I like the finial style better. Which do you like better to go with the new cabinets?
The new rod for sure! - Rachel
ReplyDeleteI like the new rod. It matches the kitchen knobs better You are going to LOVE your new kitchen!!!
ReplyDeleteI love that floor vent!! Peewee
ReplyDelete